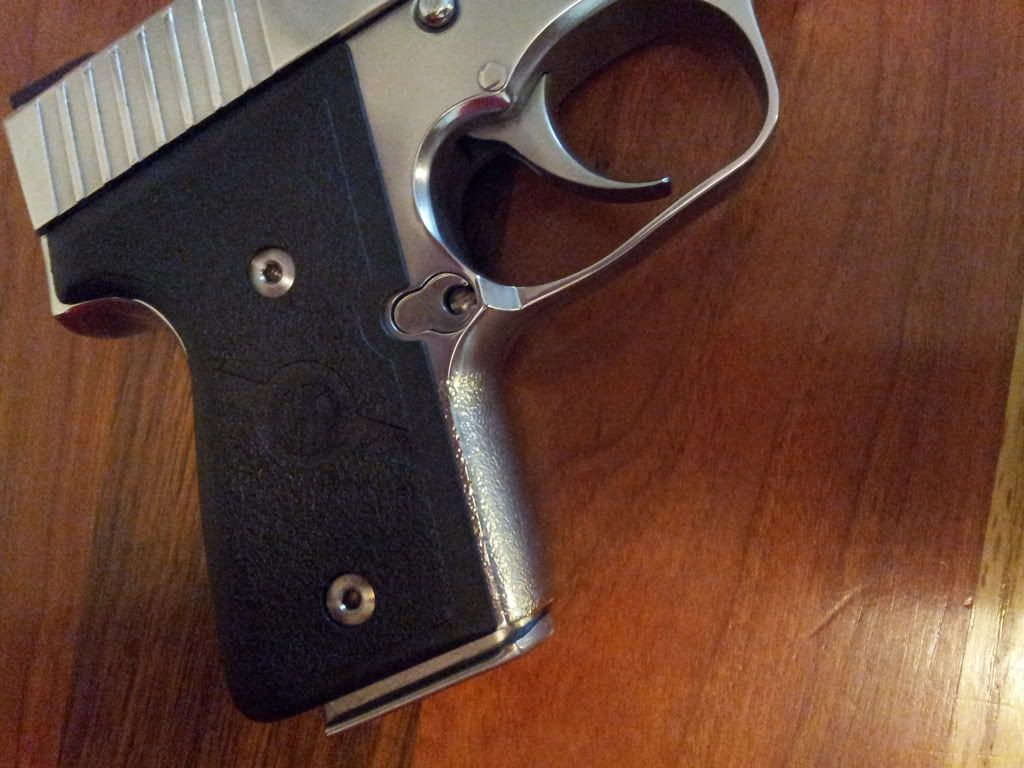
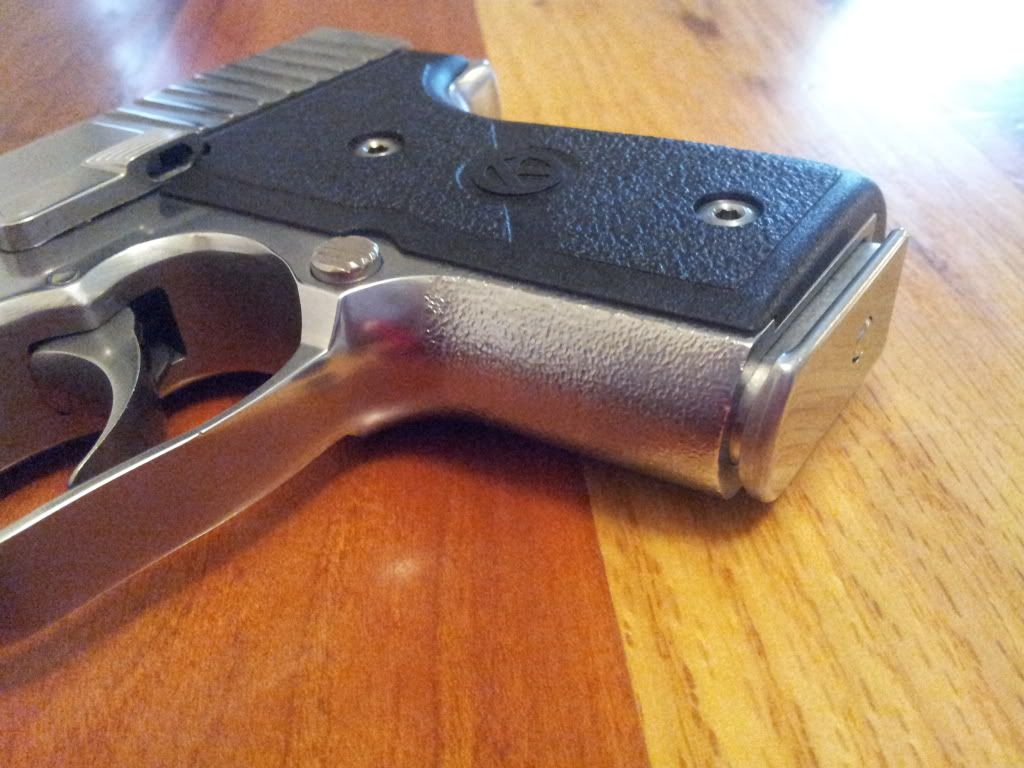
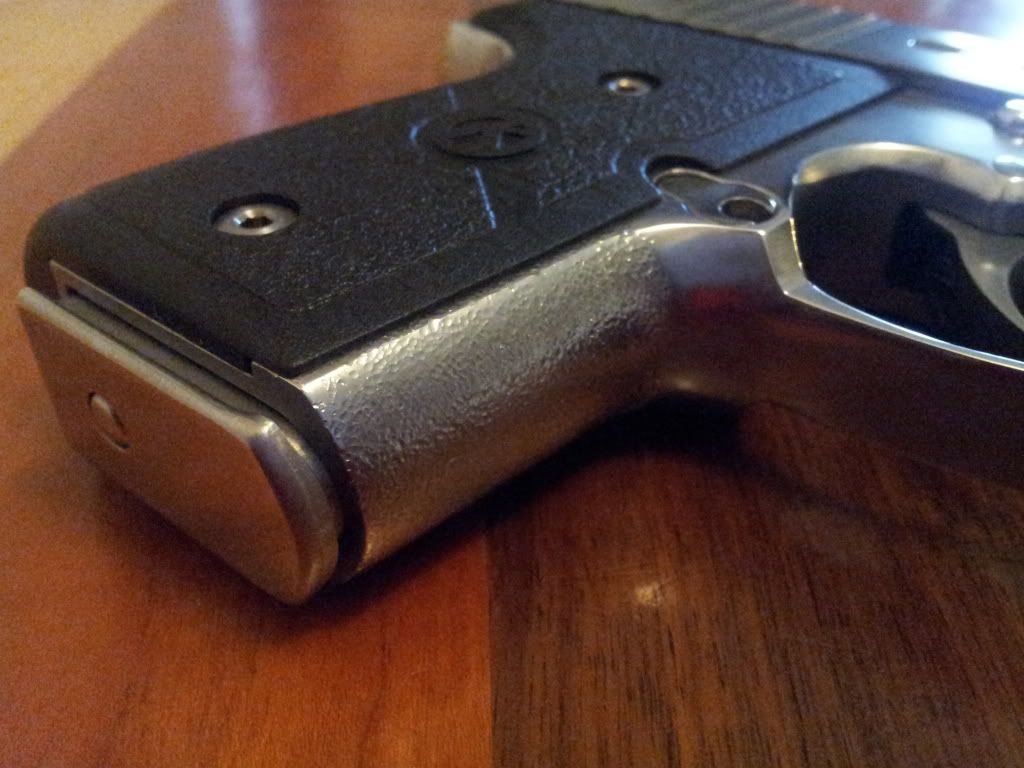
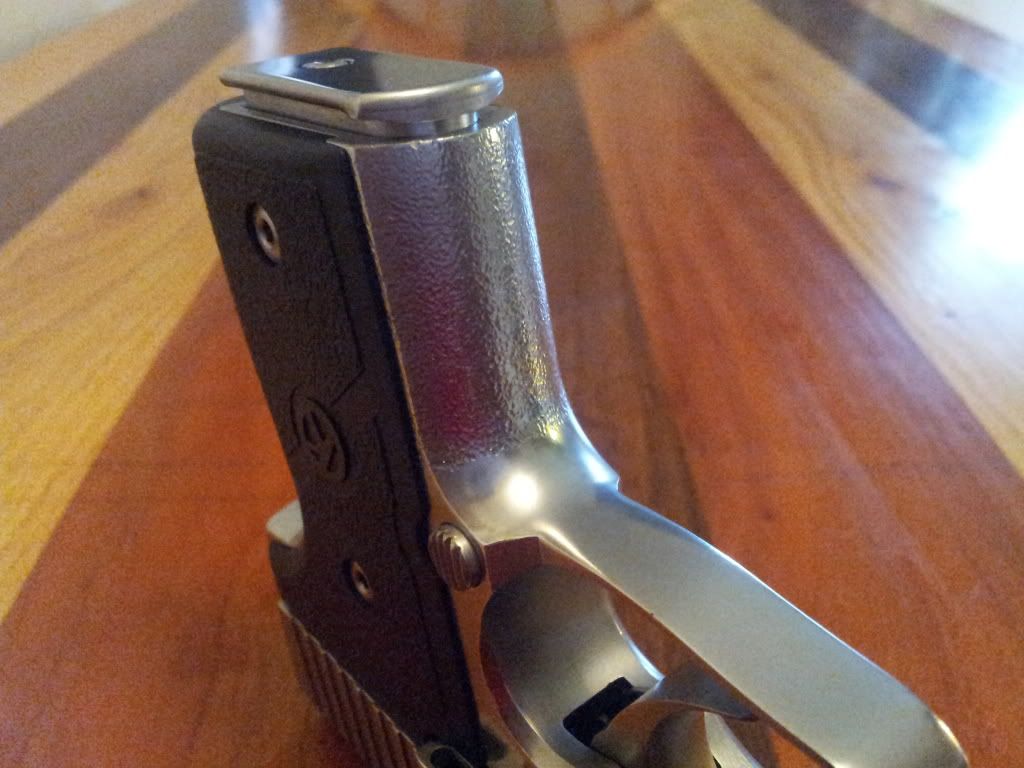
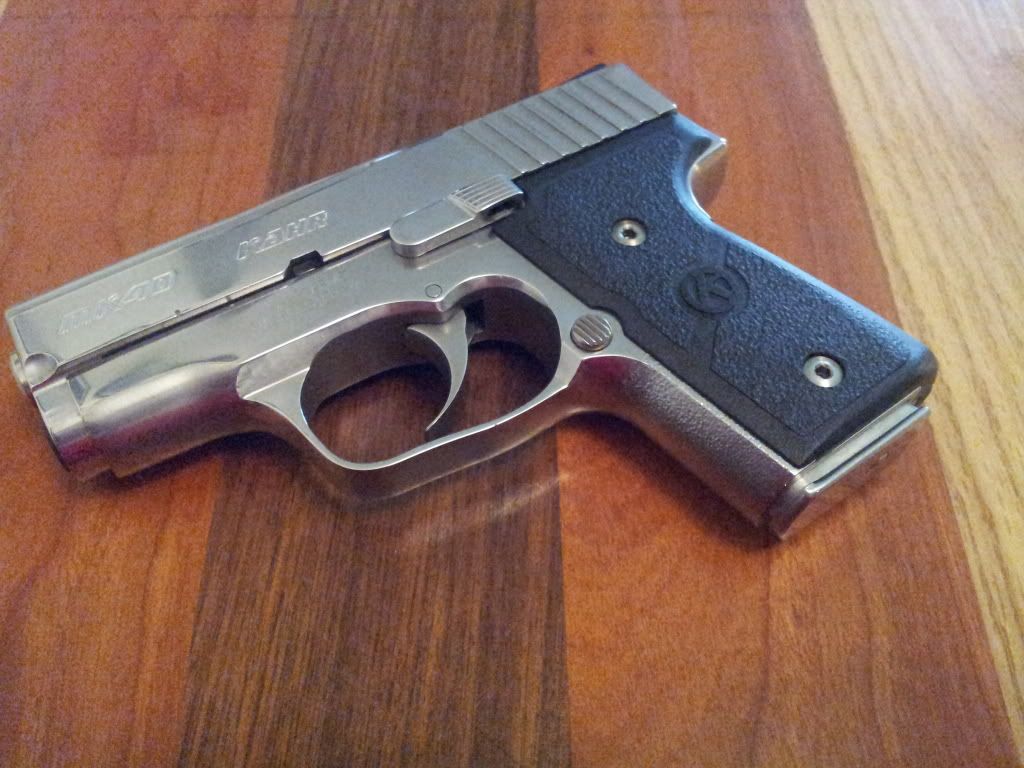
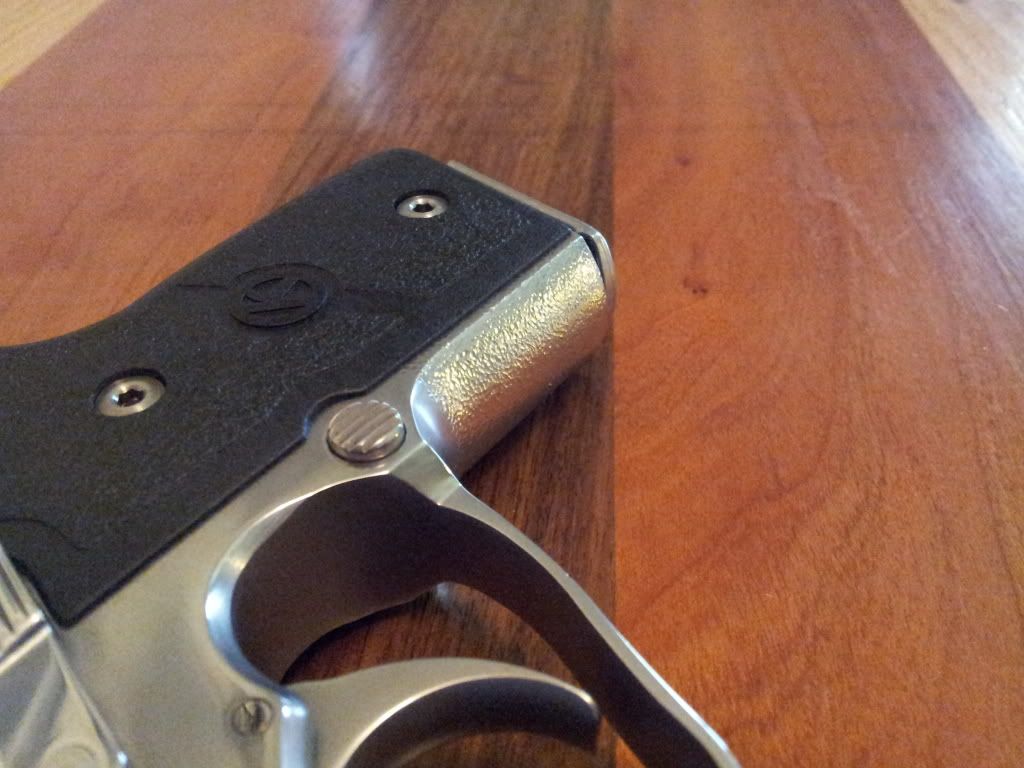
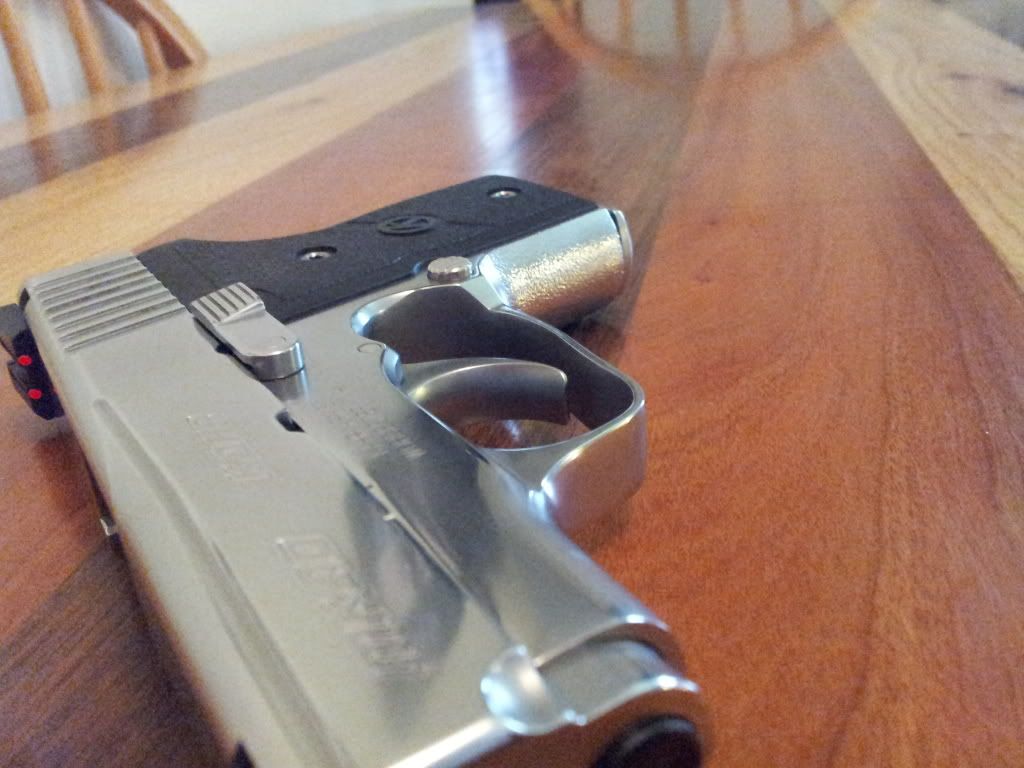
I'm done!(For now) It took me about 1 Hour to complete. I'm very happy with it. It adds just enough texture for a more secure grip and I think it looks aesthetically pleasing as well.


 Member
I'm done!(For now) It took me about 1 Hour to complete. I'm very happy with it. It adds just enough texture for a more secure grip and I think it looks aesthetically pleasing as well.
 KahrTalk 1K Member
Nice. I was worried for you.
 Super Moderator
FatMatt,
WELL DONE!!!! That looks great.
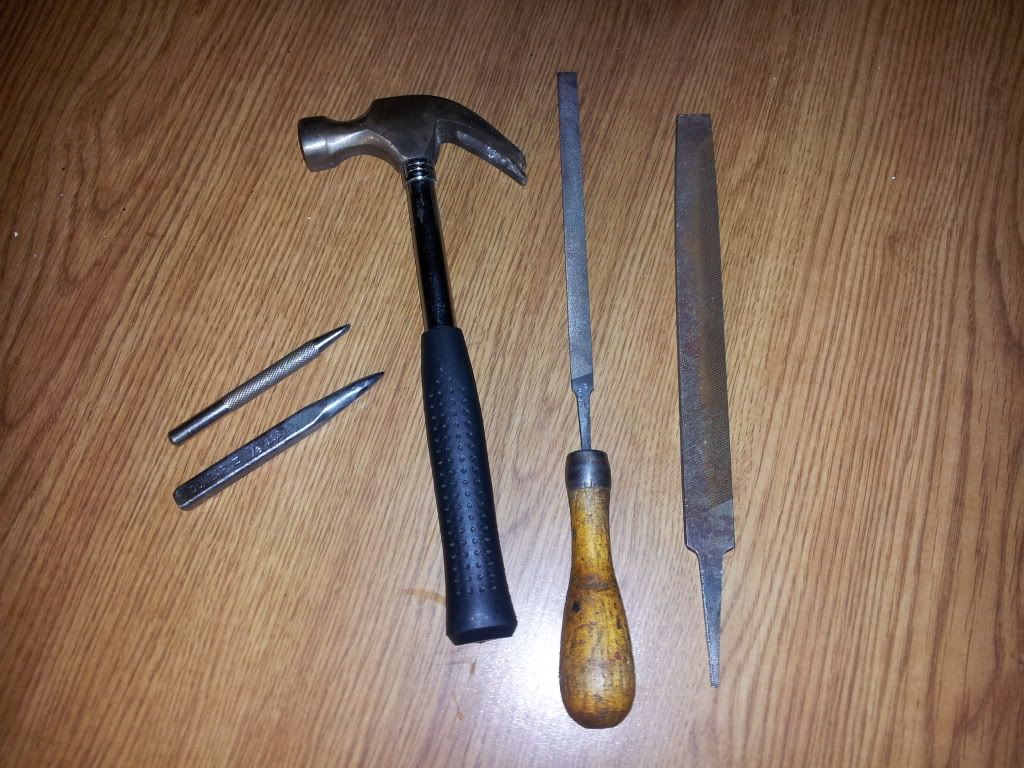
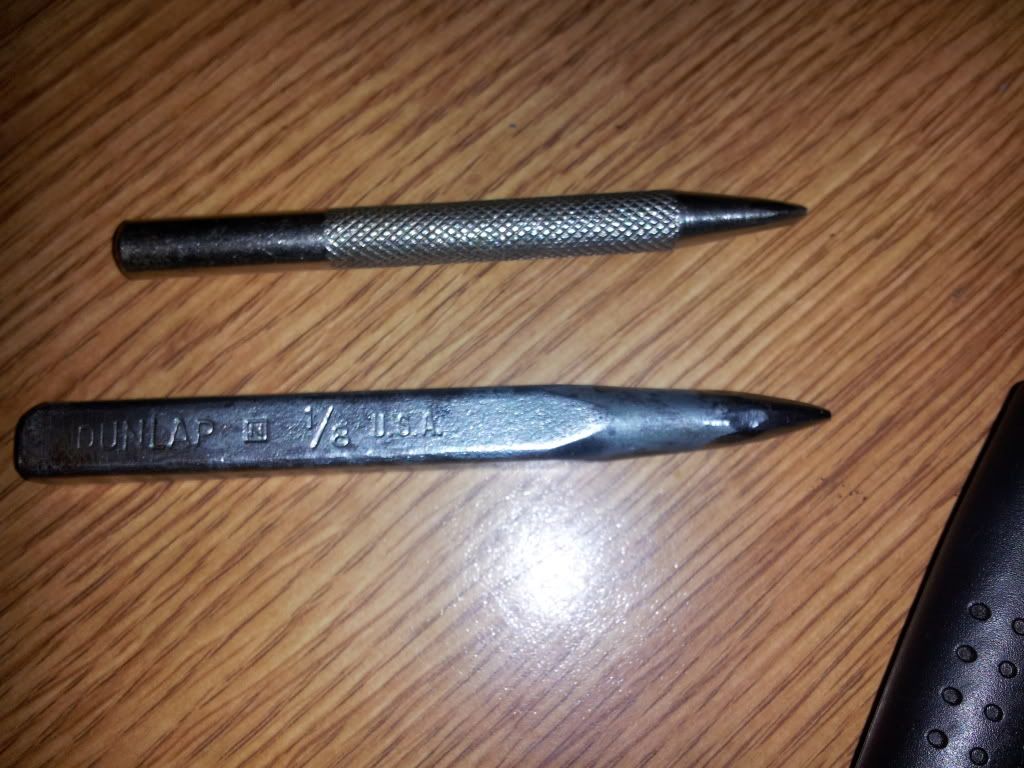
Could you please some photos of the tools used (in particular the tips)?
Do you work from an angle with the punches, straight on, or a combo of both? I wish somebody would make a video of the process. Does anyone know of a video showing it?
Again, well done and thanks for sharing the photos
Regards,
Greg
Member
There is no videos of a step by step process. I would like to make one, but I have to find someone to hold the camera first ( Or convince my wife to do it). But I can explain how I did this, First I used a light hammer , Two 1/8" Carbide punches (Hand sharpened with metal files) , You don't want to use a grinding wheel because the tip of the punch will heat up and lose its temper, It will basically break right off. I tightened down the frame in a vice wrapped in denim, rested the heel of my punch hand on the vice and elevated the punch about 1/8" off the area I was working on. Then I would strike the punch down about 15 degrees off tilt from vertical. The most important thing is to stay consistent. The hardest part is the first punch, its all easy from there.Originally Posted by gb6491

I guess you could use special types of punches with different tips , I just sharpened to a needle point and went on from there.
Super Moderator
FatMatt,
Thanks for taking the time to put that together. I very much appreciate it.
Regards,
Greg
 Colonel
Bravo! I think it looks very good. Wish I could feel it. I know that you can tweak if you feel the need. I've seen different shapes of punches and applied at angles can make it more aggressive or less aggressive.
It's a scary thing taking on a cherished firearm with a hammer and a punch or a wood burner etc but you done really good.
Today your MK40, tomorrow the world.
In Memory of Paul "Dietrich" Stines.
Dad: Say something nice to your cousin Shirley
Dietrich: For a fat girl you sure don't sweat much.
Cue sound of Head slap.
RIP Muggsy & TMan
"If you are a warrior legally authorized to carry a weapon and you step outside without that weapon, then you become a sheep, pretending that JOCKO will not come today."
Member
I can best describe it as it feels similar to 120 grit sandpaper.
 Senior Member
Looks great. There is no way that looks like a "first attempt at stippling".
Well done.
Cheers
PP
Colonel
That should be perfect for a front strap.
In Memory of Paul "Dietrich" Stines.
Dad: Say something nice to your cousin Shirley
Dietrich: For a fat girl you sure don't sweat much.
Cue sound of Head slap.
RIP Muggsy & TMan
"If you are a warrior legally authorized to carry a weapon and you step outside without that weapon, then you become a sheep, pretending that JOCKO will not come today."
 Senior Member
Excellent.
 Posting Permissions


 Reply With Quote